Qwiic_Micro_OLED_Py
![]()
![]()


![]()

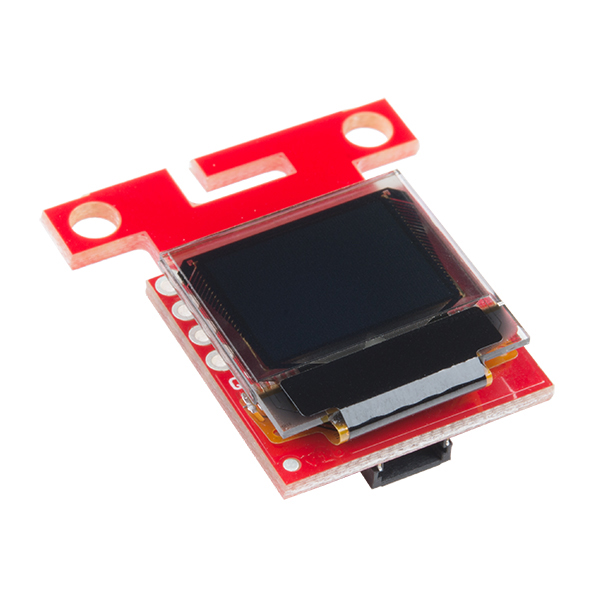
Python package for the qwiic Micro OLED board
This package is a port of the SparkFun Micro OLED Breakout Arduino Library
This package can be used in conjunction with the overall SparkFun qwiic Python Package
New to qwiic? Take a look at the entire SparkFun qwiic ecosystem.
Supported Platforms
The qwiic Python package current supports the following platforms:
Dependencies
This driver package depends on the qwiic I2C driver: Qwiic_I2C_Py
Documentation
The SparkFun qwiic Micro OLED module documentation is hosted at ReadTheDocs
Installation
PyPi Installation
This repository is hosted on PyPi as the sparkfun-qwiic-micro-oled package. On systems that support PyPi installation via pip, this library is installed using the following commands
For all users (note: the user must have sudo privileges):
sudo pip install sparkfun-qwiic-micro-oled
For the current user:
pip install sparkfun_qwiic_micro_oled
Local Installation
To install, make sure the setuptools package is installed on the system.
Direct installation at the command line:
python setup.py install
To build a package for use with pip:
python setup.py sdist
A package file is built and placed in a subdirectory called dist. This package file can be installed using pip.
cd dist
pip install sparkfun_micro_oled-<version>.tar.gz
Example Use
See the examples directory for more detailed use examples.
import qwiic_micro_oled
import sys
def runExample():
# These three lines of code are all you need to initialize the
# OLED and print the splash screen.
# Before you can start using the OLED, call begin() to init
# all of the pins and configure the OLED.
print("\nSparkFun Micro OLED - Hello Example\n")
myOLED = qwiic_micro_oled.QwiicMicroOled()
if myOLED.isConnected() == False:
print("The Qwiic Micro OLED device isn't connected to the system. Please check your connection", \
file=sys.stderr)
return
# Before you can start using the OLED, call begin() to init all of the pins and configure the OLED.
myOLED.begin()
myOLED.clear(myOLED.PAGE) # Clear the display's buffer
myOLED.print("Hello World") # Add "Hello World" to buffer
# To actually draw anything on the display, you must call the display() function.
myOLED.display()
runExample()
![]()
Table of Contents
API Reference
qwiic_micro_oled
Python module for the [Qwiic Micro OLED Display](https://www.sparkfun.com/products/14532)
This python package is a port of the existing [SparkFun Micro OLED Arduino Library](https://github.com/sparkfun/SparkFun_Micro_OLED_Arduino_Library)
This package can be used in conjunction with the overall [SparkFun qwiic Python Package](https://github.com/sparkfun/Qwiic_Py)
New to qwiic? Take a look at the entire [SparkFun qwiic ecosystem](https://www.sparkfun.com/qwiic).
-
class
qwiic_micro_oled.QwiicMicroOled(address=None, i2c_driver=None)[source]¶ Parameters: - address – The I2C address to use for the device. If not provided, the default address is used.
- i2c_driver – An existing i2c driver object. If not provided a driver object is created.
Returns: The Micro OLED device object.
Return type: Object
-
begin()[source]¶ Initialize the operation of the Micro OLED module
Returns: Returns true of the initializtion was successful, otherwise False. Return type: bool
-
circle(x0, y0, radius, color=None, mode=None)[source]¶ Draw a circle on the diplay. A color can be specified. Pixel copy mode is either Normal (source copy) or XOR
Parameters: - x0 – The X center position for the circle
- y0 – The Y center position for the circle.
- radius – The radius of the circle
- color – The color to draw. If not set, the default foreground color is used.
- mode – The mode to draw the pixl to the screen bufffer. Value can be either XOR or NORM. Default is NORM
Returns: No return value
-
clear(mode, value=0)[source]¶ Clear the display on the OLED Device.
Parameters: - mode – To clear GDRAM inside the LCD controller, pass in the variable mode = ALL, and to clear screen page buffer pass in the variable mode = PAGE.
- value – The value to clear the screen to. Default value is 0
Returns: No return value
-
connected¶ Determine if a Micro OLED device is conntected to the system..
Returns: True if the device is connected, otherwise False. Return type: bool
-
contrast(contrast)[source]¶ Set the OLED contract value from 0 to 255. Note: Contrast level is not very obvious on the display.
Parameters: contrast – Contrast Value between 0-255 Returns: No return value
-
display()[source]¶ Display the current screen buffer on the Display device. Bulk move the screen buffer to the SSD1306 controller’s memory so that images/graphics drawn on the screen buffer will be displayed on the OLED.
Returns: No return value
-
draw_bitmap(bitArray)[source]¶ Draw Bitmap image on screen. To use, create int array that is 64x48 pixels (384 bytes). Then call .draw_bitmap and pass it the array.
Parameters: bitArray – The bitmap to draw Returns: No return value
-
draw_char(x, y, c, color=None, mode=None)[source]¶ Draw character c using color and draw mode at x,y. Pixel copy mode is either Normal (source copy) or XOR
Parameters: - x – The X position on the display
- y – The Y position on the display
- c – The character to draw
- color – The color to draw. If not set, the default foreground color is used.
- mode – The mode to draw the pixl to the screen bufffer. Value can be either XOR or NORM. Default is NORM
Returns: No return value
-
font_height¶ The height of the current font
Returns: height of the font Rvalue: integer
-
font_type¶ Return the font type number of the current font.
Returns: Font type number. Rvalue: integer
-
font_width¶ The width of the current font
Returns: width of the font Rvalue: integer
-
get_font_start_char()[source]¶ Return the starting ASCII character of the currnet font, not all fonts start with ASCII character 0. Custom fonts can start from any ASCII character.
Returns: Starting character of the current font. Rvalue: integer
-
get_font_total_char()[source]¶ The total number of characters in the current font.
Returns: Total number of characters Rvalue: integer
-
get_font_type()[source]¶ Return the font type number of the current font.
Returns: Font type number. Rvalue: integer
-
get_lcd_height()[source]¶ The height of the display in pixels
Returns: height of the display Rvalue: integer
-
get_lcd_width()[source]¶ The width of the display in pixels
Returns: width of the display Rvalue: integer
-
get_screenbuffer()[source]¶ Return a pointer to the start of the RAM screen buffer for direct access.
Returns: The internal screen buffer Return type: integer array
-
get_total_fonts()[source]¶ Return the total number of fonts loaded into the MicroOLED’s flash memory.
Returns: Total number of fonts available Rvalue: integer
-
height¶ The height of the display in pixels
Returns: height of the display Rvalue: integer
-
invert(inv)[source]¶ Invert the display of the display. The WHITE color of the display will turn to BLACK and the BLACK will turn to WHITE.
Parameters: inv – If True, the screen is inverted. If False the screen is set to Normal mode. Returns: No return value
-
is_connected()[source]¶ Determine if a Micro OLED device is conntected to the system..
Returns: True if the device is connected, otherwise False. Return type: bool
-
line(x0, y0, x1, y1, color=None, mode=None)[source]¶ Draw a line starting at and ending at specified coordinates, with a given color. Pixel copy mode is either Normal (source copy) or XOR
Parameters: - x0 – The X starting position for the line
- y0 – The Y starting position for the line.
- x1 – The X ending position for the line
- y1 – The Y ending position for the line.
- color – The color to draw. If not set, the default foreground color is used.
- mode – The mode to draw the pixl to the screen bufffer. Value can be either XOR or NORM. Default is NORM
Returns: No return value
-
line_h(x, y, width, color=None, mode=None)[source]¶ Draw a horizontal line defined by a starting position and width. A color can be specified. Pixel copy mode is either Normal (source copy) or XOR
Parameters: - x – The X starting position for the line
- y – The Y starting position for the line.
- width – The width (length) of the line
- color – The color to draw. If not set, the default foreground color is used.
- mode – The mode to draw the pixl to the screen bufffer. Value can be either XOR or NORM. Default is NORM
Returns: No return value
-
line_v(x, y, height, color=None, mode=None)[source]¶ Draw a vertical line defined by a starting position and width. A color can be specified. Pixel copy mode is either Normal (source copy) or XOR
Parameters: - x – The X starting position for the line
- y – The Y starting position for the line.
- height – The height (length) of the line
- color – The color to draw. If not set, the default foreground color is used.
- mode – The mode to draw the pixl to the screen bufffer. Value can be either XOR or NORM. Default is NORM
Returns: No return value
-
pixel(x, y, color=None, mode=None)[source]¶ Draw a pixel at a given position, with a given color. Pixel copy mode is either Normal (source copy) or XOR
Parameters: - x – The X position on the display
- y – The Y position on the display
- color – The color to draw. If not set, the default foreground color is used.
- mode – The mode to draw the pixl to the screen bufffer. Value can be either XOR or NORM. Default is NORM
Returns: No return value
-
print(text)[source]¶ Print a line of text on the display using the current font, starting at the current position.
Parameters: text – The line of text to write. Returns: No return value
-
rect(x, y, width, height, color=None, mode=None)[source]¶ Draw a rectangle on the diplay. A color can be specified. Pixel copy mode is either Normal (source copy) or XOR
Parameters: - x – The X starting position for the rectangle
- y – The Y starting position for the rectangle.
- width – The width of the rectangle
- height – The height of the rectangle
- color – The color to draw. If not set, the default foreground color is used.
- mode – The mode to draw the pixl to the screen bufffer. Value can be either XOR or NORM. Default is NORM
Returns: No return value
-
rect_fill(x, y, width, height, color=None, mode=None)[source]¶ Draw a filled rectangle on the diplay. A color can be specified. Pixel copy mode is either Normal (source copy) or XOR
Parameters: - x – The X starting position for the rectangle
- y – The Y starting position for the rectangle.
- width – The width of the rectangle
- height – The height of the rectangle
- color – The color to draw. If not set, the default foreground color is used.
- mode – The mode to draw the pixl to the screen bufffer. Value can be either XOR or NORM. Default is NORM
Returns: No return value
-
scroll_left(start, stop)[source]¶ Set row start to row stop on the OLED to scroll left. Refer to http://learn.microview.io/intro/general-overview-of-microview.html for explanation of the rows.
Parameters: - start – The staring position on the display
- stop – The stopping position on the display
Returns: No return value
-
scroll_right(start, stop)[source]¶ Set row start to row stop on the OLED to scroll right. Refer to http://learn.microview.io/intro/general-overview-of-microview.html for explanation of the rows.
Parameters: - start – The staring position on the display
- stop – The stopping position on the display
Returns: No return value
-
set_color(color)[source]¶ Set the current draw’s color. Only WHITE and BLACK available.
Parameters: color – Color Value Returns: No return value
-
set_column_address(colAddress)[source]¶ Set SSD1306 column address.
Parameters: colAddress – The column address command and address Returns: No return value
-
set_cursor(x, y)[source]¶ Set the current cusor position for writing text
Parameters: - x – The X position on the display
- y – The Y position on the display
Returns: No return value
-
set_draw_modee(mode)[source]¶ Set current draw mode with NORM or XOR.
Parameters: mode – Draw Mode Returns: No return value
-
set_font_type(font_type)[source]¶ Set the current font type number, ie changing to different fonts base on the type provided.
Parameters: type – The type to set the font to. Returns: No return value
-
set_page_address(pageAddress)[source]¶ Set SSD1306 page address.
Parameters: pageAddress – The page address command and address Returns: No return value
-
width¶ The width of the display in pixels
Returns: width of the display Rvalue: integer
Bitmap Example
1 2 3 4 5 6 7 8 9 10 11 12 13 14 15 16 17 18 19 20 21 22 23 24 25 26 27 28 29 30 31 32 33 34 35 36 37 38 39 40 41 42 43 44 45 46 47 48 49 50 51 52 53 54 55 56 57 58 59 60 61 62 63 64 65 66 67 68 69 70 71 72 73 74 75 76 77 78 79 80 81 82 83 84 85 86 87 88 89 90 91 92 93 94 95 96 97 98 99 100 101 102 103 104 105 106 | #!/usr/bin/env python
#-----------------------------------------------------------------------------
# qwiic_micro_oled_hello.py
#
# Simple Example for the Qwiic MicroOLED Device
#------------------------------------------------------------------------
#
# Written by SparkFun Electronics, May 2019
#
# This python library supports the SparkFun Electroncis qwiic
# qwiic sensor/board ecosystem on a Raspberry Pi (and compatable) single
# board computers.
#
# More information on qwiic is at https:# www.sparkfun.com/qwiic
#
# Do you like this library? Help support SparkFun. Buy a board!
#
#==================================================================================
# Copyright (c) 2019 SparkFun Electronics
#
# Permission is hereby granted, free of charge, to any person obtaining a copy
# of this software and associated documentation files (the "Software"), to deal
# in the Software without restriction, including without limitation the rights
# to use, copy, modify, merge, publish, distribute, sublicense, and/or sell
# copies of the Software, and to permit persons to whom the Software is
# furnished to do so, subject to the following conditions:
#
# The above copyright notice and this permission notice shall be included in all
# copies or substantial portions of the Software.
#
# THE SOFTWARE IS PROVIDED "AS IS", WITHOUT WARRANTY OF ANY KIND, EXPRESS OR
# IMPLIED, INCLUDING BUT NOT LIMITED TO THE WARRANTIES OF MERCHANTABILITY,
# FITNESS FOR A PARTICULAR PURPOSE AND NONINFRINGEMENT. IN NO EVENT SHALL THE
# AUTHORS OR COPYRIGHT HOLDERS BE LIABLE FOR ANY CLAIM, DAMAGES OR OTHER
# LIABILITY, WHETHER IN AN ACTION OF CONTRACT, TORT OR OTHERWISE, ARISING FROM,
# OUT OF OR IN CONNECTION WITH THE SOFTWARE OR THE USE OR OTHER DEALINGS IN THE
# SOFTWARE.
#==================================================================================
# Example - simple command to display a bitmap on the OLED.
#
from __future__ import print_function
import qwiic_micro_oled
import sys
bender = [ \
0xFF, 0xFF, 0xFF, 0xFF, 0xFF, 0xFF, 0xFF, 0xFF, 0xFF, 0x7F, 0xBF, 0xDF, 0x5F, 0x5F, 0x5F, 0x5F,\
0x5F, 0x5F, 0x5F, 0x5F, 0x5F, 0x5F, 0x5F, 0x5F, 0x5F, 0x5F, 0x5F, 0x5F, 0x5F, 0x5F, 0x5F, 0x5F,\
0x5F, 0x5F, 0x5F, 0x5F, 0x5F, 0x5F, 0x5F, 0x5F, 0x5F, 0x5F, 0x5F, 0x5F, 0x5F, 0x5F, 0x5F, 0x5F,\
0x5F, 0xDF, 0xBF, 0x7F, 0xFF, 0xFF, 0xFF, 0xFF, 0xFF, 0xFF, 0xFF, 0xFF, 0xFF, 0xFF, 0xFF, 0xFF,\
0xFF, 0xFF, 0xFF, 0xFF, 0xFF, 0xFF, 0x07, 0xF9, 0xFE, 0x07, 0x01, 0x00, 0x00, 0xF8, 0xFE, 0xFF,\
0xFF, 0xFF, 0x1F, 0x1F, 0x1F, 0xFF, 0xFF, 0xFE, 0xFC, 0xF8, 0xF0, 0xE0, 0x00, 0x00, 0x00, 0x00,\
0xE0, 0xF0, 0xF8, 0xFC, 0xFE, 0xFF, 0xFF, 0x1F, 0x1F, 0x1F, 0xFF, 0xFF, 0xFF, 0xFF, 0xFE, 0xF8,\
0x00, 0x00, 0x01, 0x07, 0xFE, 0xF9, 0x07, 0xFF, 0xFF, 0xFF, 0xFF, 0xFF, 0xFF, 0xFF, 0xFF, 0xFF,\
0xFF, 0xFF, 0xFF, 0xFF, 0xFF, 0xFF, 0xFE, 0xF9, 0xE7, 0xDC, 0xB0, 0xA0, 0x40, 0x41, 0x47, 0x4F,\
0x5F, 0x5F, 0x5F, 0x5F, 0x5F, 0x5F, 0x5F, 0x5F, 0x5F, 0x4F, 0x47, 0x43, 0x40, 0x40, 0x40, 0x40,\
0x43, 0x47, 0x4F, 0x5F, 0x5F, 0x5F, 0x5F, 0x5F, 0x5F, 0x5F, 0x5F, 0x5F, 0x4F, 0x47, 0x43, 0x40,\
0x40, 0xA0, 0xB0, 0xDE, 0xE7, 0xF9, 0xFE, 0x1F, 0x0F, 0x07, 0x73, 0x79, 0xFF, 0xFF, 0xFF, 0xFF,\
0xFF, 0xFF, 0xFF, 0xFF, 0xFF, 0xFF, 0xFF, 0xFF, 0xFF, 0xFF, 0xFF, 0xFF, 0xFF, 0xFF, 0xFF, 0x7F,\
0xBF, 0x5F, 0xEF, 0x0F, 0xEF, 0xEF, 0xDF, 0xDF, 0x1F, 0xDF, 0xDF, 0xDF, 0xDF, 0x1F, 0xDF, 0xDF,\
0xDF, 0xDF, 0xDF, 0x1F, 0xDF, 0xDF, 0xDF, 0xEF, 0x0F, 0xEF, 0xDF, 0xBF, 0x7F, 0xFF, 0xFF, 0xFF,\
0x7F, 0x7F, 0x7F, 0x7F, 0x7F, 0xFF, 0xFF, 0xFF, 0xBE, 0x9C, 0xC0, 0xE0, 0xF0, 0xF9, 0xFF, 0xFF,\
0xFF, 0xFF, 0xFF, 0xFF, 0xFF, 0xFF, 0xFF, 0xFF, 0xFF, 0xFF, 0xFF, 0xFF, 0xFF, 0xFF, 0xFF, 0xC0,\
0xB7, 0x6F, 0xEE, 0x00, 0xDE, 0xDE, 0xDE, 0xDD, 0x00, 0xDD, 0xDD, 0xDD, 0xDD, 0x00, 0xDD, 0xDD,\
0xDD, 0xC5, 0xC1, 0x00, 0xC9, 0xC5, 0xC1, 0x01, 0xC8, 0xC4, 0x42, 0x80, 0xC0, 0xE8, 0xE4, 0xE2,\
0xE0, 0xE0, 0xEF, 0xEF, 0xE6, 0xF0, 0xFF, 0xFF, 0xFF, 0xFF, 0xFF, 0xFF, 0xFF, 0xFF, 0xFF, 0xFF,\
0xFF, 0xFF, 0xFF, 0xFF, 0xFF, 0xFF, 0xFF, 0xFF, 0xFF, 0xFF, 0xFF, 0xFF, 0xFF, 0xFF, 0xFF, 0xFF,\
0xFF, 0xFF, 0xFE, 0xFE, 0xFD, 0xFD, 0xFD, 0xFB, 0xF8, 0xFB, 0xFB, 0xFB, 0xFB, 0xF8, 0xFB, 0xFB,\
0xFB, 0xFB, 0xFB, 0xF8, 0xFB, 0xFD, 0xFD, 0xFC, 0xFE, 0xFE, 0xFF, 0xFF, 0xFF, 0xFF, 0xFF, 0xFF,\
0xFF, 0xFF, 0xFF, 0xFF, 0xFF, 0xFF, 0xFF, 0xFF, 0xFF, 0xFF, 0xFF, 0xFF, 0xFF, 0xFF, 0xFF, 0xFF
]
def runExample():
# These three lines of code are all you need to initialize the
# OLED and print the splash screen.
# Before you can start using the OLED, call begin() to init
# all of the pins and configure the OLED.
print("\nSparkFun Micro OLED Bitmap Example\n")
myOLED = qwiic_micro_oled.QwiicMicroOled()
if not myOLED.connected:
print("The Qwiic Micro OLED device isn't connected to the system. Please check your connection", \
file=sys.stderr)
return
myOLED.begin()
# clear(ALL) will clear out the OLED's graphic memory.
# clear(PAGE) will clear the Arduino's display buffer.
myOLED.clear(myOLED.PAGE) # Clear the display's memory (gets rid of artifacts)
myOLED.draw_bitmap(bender)
# To actually draw anything on the display, you must call the
# display() function.
myOLED.display()
if __name__ == '__main__':
try:
runExample()
except (KeyboardInterrupt, SystemExit) as exErr:
print("\nEnding OLED bitmap Example")
sys.exit(0)
|
Cube Example
1 2 3 4 5 6 7 8 9 10 11 12 13 14 15 16 17 18 19 20 21 22 23 24 25 26 27 28 29 30 31 32 33 34 35 36 37 38 39 40 41 42 43 44 45 46 47 48 49 50 51 52 53 54 55 56 57 58 59 60 61 62 63 64 65 66 67 68 69 70 71 72 73 74 75 76 77 78 79 80 81 82 83 84 85 86 87 88 89 90 91 92 93 94 95 96 97 98 99 100 101 102 103 104 105 106 107 108 109 110 111 112 113 114 115 116 117 118 119 120 121 122 123 124 125 126 127 128 129 130 131 132 133 134 135 136 137 138 139 140 141 142 143 | #!/usr/bin/env python
#-----------------------------------------------------------------------------
# qwiic_micro_oled_cube.py
#
# Simple Example for the Qwiic MicroOLED Device
#------------------------------------------------------------------------
#
# Written by SparkFun Electronics, May 2019
#
# This python library supports the SparkFun Electroncis qwiic
# qwiic sensor/board ecosystem on a Raspberry Pi (and compatable) single
# board computers.
#
# More information on qwiic is at https:# www.sparkfun.com/qwiic
#
# Do you like this library? Help support SparkFun. Buy a board!
#==================================================================================
# Copyright (c) 2019 SparkFun Electronics
#
# Permission is hereby granted, free of charge, to any person obtaining a copy
# of this software and associated documentation files (the "Software"), to deal
# in the Software without restriction, including without limitation the rights
# to use, copy, modify, merge, publish, distribute, sublicense, and/or sell
# copies of the Software, and to permit persons to whom the Software is
# furnished to do so, subject to the following conditions:
#
# The above copyright notice and this permission notice shall be included in all
# copies or substantial portions of the Software.
#
# THE SOFTWARE IS PROVIDED "AS IS", WITHOUT WARRANTY OF ANY KIND, EXPRESS OR
# IMPLIED, INCLUDING BUT NOT LIMITED TO THE WARRANTIES OF MERCHANTABILITY,
# FITNESS FOR A PARTICULAR PURPOSE AND NONINFRINGEMENT. IN NO EVENT SHALL THE
# AUTHORS OR COPYRIGHT HOLDERS BE LIABLE FOR ANY CLAIM, DAMAGES OR OTHER
# LIABILITY, WHETHER IN AN ACTION OF CONTRACT, TORT OR OTHERWISE, ARISING FROM,
# OUT OF OR IN CONNECTION WITH THE SOFTWARE OR THE USE OR OTHER DEALINGS IN THE
# SOFTWARE.
#==================================================================================
# Example - simple command to draw a cube the OLED.
#
from __future__ import print_function, division
import qwiic_micro_oled
import sys
import time
import math
d = 3
px = [-d, d, d, -d, -d, d, d, -d ]
py = [-d, -d, d, d, -d, -d, d, d ]
pz = [-d, -d, -d, -d, d, d, d, d ]
p2x = [0,0,0,0,0,0,0,0]
p2y = [0,0,0,0,0,0,0,0]
r = [0,0,0]
SHAPE_SIZE=600
def drawCube(oled):
global p2x, p2y, r
r[0]=r[0] + math.pi/180.0 # Add a degree
r[1]=r[1] + math.pi/180.0 # Add a degree
r[2]=r[2] + math.pi/180.0 # Add a degree
if r[0] >= 360.0*math.pi/180.0:
r[0] = 0
if r[1] >= 360.0*math.pi/180.0:
r[1] = 0
if r[2] >= 360.0*math.pi/180.0:
r[2] = 0
scrWidth = oled.get_lcd_width()
scrHeight = oled.get_lcd_height()
for i in range(8):
px2 = px[i]
py2 = math.cos(r[0])*py[i] - math.sin(r[0])*pz[i]
pz2 = math.sin(r[0])*py[i] + math.cos(r[0])*pz[i]
px3 = math.cos(r[1])*px2 + math.sin(r[1])*pz2
py3 = py2
pz3 = -math.sin(r[1])*px2 + math.cos(r[1])*pz2
ax = math.cos(r[2])*px3 - math.sin(r[2])*py3
ay = math.sin(r[2])*px3 + math.cos(r[2])*py3
az = pz3-150
p2x[i] = scrWidth/2+ax*SHAPE_SIZE/az
p2y[i] = scrHeight/2+ay*SHAPE_SIZE/az
oled.clear(oled.PAGE)
for i in range(3):
oled.line(p2x[i],p2y[i],p2x[i+1],p2y[i+1])
oled.line(p2x[i+4],p2y[i+4],p2x[i+5],p2y[i+5])
oled.line(p2x[i],p2y[i],p2x[i+4],p2y[i+4])
oled.line(p2x[3],p2y[3],p2x[0],p2y[0])
oled.line(p2x[7],p2y[7],p2x[4],p2y[4])
oled.line(p2x[3],p2y[3],p2x[7],p2y[7])
oled.display()
def runExample():
# These three lines of code are all you need to initialize the
# OLED and print the splash screen.
# Before you can start using the OLED, call begin() to init
# all of the pins and configure the OLED.
print("\nSparkFun Micro OLED Cube Example\n")
myOLED = qwiic_micro_oled.QwiicMicroOled()
if not myOLED.connected:
print("The Qwiic Micro OLED device isn't connected to the system. Please check your connection", \
file=sys.stderr)
return
myOLED.begin()
# clear(ALL) will clear out the OLED's graphic memory.
# clear(PAGE) will clear the Arduino's display buffer.
myOLED.clear(myOLED.ALL) # Clear the display's memory (gets rid of artifacts)
# To actually draw anything on the display, you must call the
# display() function.
myOLED.display()
while True:
drawCube(myOLED)
time.sleep(.01)
if __name__ == '__main__':
try:
runExample()
except (KeyboardInterrupt, SystemExit) as exErr:
print("\nEnding OLED Cube Example")
sys.exit(0)
|
Complete Example
1 2 3 4 5 6 7 8 9 10 11 12 13 14 15 16 17 18 19 20 21 22 23 24 25 26 27 28 29 30 31 32 33 34 35 36 37 38 39 40 41 42 43 44 45 46 47 48 49 50 51 52 53 54 55 56 57 58 59 60 61 62 63 64 65 66 67 68 69 70 71 72 73 74 75 76 77 78 79 80 81 82 83 84 85 86 87 88 89 90 91 92 93 94 95 96 97 98 99 100 101 102 103 104 105 106 107 108 109 110 111 112 113 114 115 116 117 118 119 120 121 122 123 124 125 126 127 128 129 130 131 132 133 134 135 136 137 138 139 140 141 142 143 144 145 146 147 148 149 150 151 152 153 154 155 156 157 158 159 160 161 162 163 164 165 166 167 168 169 170 171 172 173 174 175 176 177 178 179 180 181 182 183 184 185 186 187 188 189 190 191 192 193 194 195 196 197 198 199 200 201 202 203 204 205 206 207 208 209 210 211 212 213 214 215 216 217 218 219 220 221 222 223 224 225 226 227 228 229 230 231 232 233 234 235 236 237 238 239 240 241 242 243 244 245 246 247 248 249 250 251 252 253 254 255 256 257 258 259 260 261 262 263 264 265 266 267 268 269 270 271 272 273 274 275 276 277 278 279 280 281 282 283 284 285 286 287 288 289 290 291 292 293 294 295 296 297 298 299 300 301 302 303 304 305 306 307 308 309 310 311 312 313 314 315 316 317 318 319 320 321 322 323 324 325 326 327 328 329 330 331 332 333 334 335 336 337 338 339 340 341 342 343 344 345 346 347 348 349 350 351 352 353 354 355 356 357 358 359 360 361 362 363 364 365 366 367 368 369 370 371 372 373 | #!/usr/bin/env python
#-----------------------------------------------------------------------------
# qwiic_micro_oled_demo.py
#
# Simple Example for the Qwiic MicroOLED Device
#------------------------------------------------------------------------
#
# Written by SparkFun Electronics, May 2019
#
# This python library supports the SparkFun Electroncis qwiic
# qwiic sensor/board ecosystem on a Raspberry Pi (and compatable) single
# board computers.
#
# More information on qwiic is at https:# www.sparkfun.com/qwiic
#
# Do you like this library? Help support SparkFun. Buy a board!
#
#==================================================================================
# Copyright (c) 2019 SparkFun Electronics
#
# Permission is hereby granted, free of charge, to any person obtaining a copy
# of this software and associated documentation files (the "Software"), to deal
# in the Software without restriction, including without limitation the rights
# to use, copy, modify, merge, publish, distribute, sublicense, and/or sell
# copies of the Software, and to permit persons to whom the Software is
# furnished to do so, subject to the following conditions:
#
# The above copyright notice and this permission notice shall be included in all
# copies or substantial portions of the Software.
#
# THE SOFTWARE IS PROVIDED "AS IS", WITHOUT WARRANTY OF ANY KIND, EXPRESS OR
# IMPLIED, INCLUDING BUT NOT LIMITED TO THE WARRANTIES OF MERCHANTABILITY,
# FITNESS FOR A PARTICULAR PURPOSE AND NONINFRINGEMENT. IN NO EVENT SHALL THE
# AUTHORS OR COPYRIGHT HOLDERS BE LIABLE FOR ANY CLAIM, DAMAGES OR OTHER
# LIABILITY, WHETHER IN AN ACTION OF CONTRACT, TORT OR OTHERWISE, ARISING FROM,
# OUT OF OR IN CONNECTION WITH THE SOFTWARE OR THE USE OR OTHER DEALINGS IN THE
# SOFTWARE.
#==================================================================================
# Example - simple command to setup the OLED.
#
from __future__ import print_function, division
import qwiic_micro_oled
import time
import sys
import math
from random import randint
#-------------------------------------------------------------------
def pixelExample(myOLED):
print("Pixels!")
lWidth = myOLED.get_lcd_width()
lHeight = myOLED.get_lcd_height()
for i in range(128):
myOLED.pixel(randint(0, lWidth), randint(0, lHeight))
myOLED.display()
myOLED.clear(myOLED.PAGE)
#-------------------------------------------------------------------
def lineExample(myOLED):
middleX = myOLED.get_lcd_width() // 2
middleY = myOLED.get_lcd_height() // 2
lineWidth = min(middleX, middleY)
print("Lines!")
for i in range(2):
for deg in range(0, 360, 15):
xEnd = lineWidth * math.cos(deg * math.pi / 180.0)
yEnd = lineWidth * math.sin(deg * math.pi / 180.0)
myOLED.line(middleX, middleY, middleX + xEnd, middleY + yEnd)
myOLED.display()
time.sleep(.05)
for deg in range(0, 360, 15):
xEnd = lineWidth * math.cos(deg * math.pi / 180.0)
yEnd = lineWidth * math.sin(deg * math.pi / 180.0)
myOLED.line(middleX, middleY, middleX + xEnd, middleY + yEnd, myOLED.BLACK, myOLED.NORM)
myOLED.display()
time.sleep(.05)
#-------------------------------------------------------------------
def shapeExample(myOLED):
print("Shapes!")
# Silly pong demo. It takes a lot of work to fake pong...
paddleW = 3 # Paddle width
paddleH = 15 # Paddle height
lWidth = myOLED.get_lcd_width()
lHeight = myOLED.get_lcd_height()
# Paddle 0 (left) position coordinates
paddle0_Y = (lHeight // 2) - (paddleH // 2)
paddle0_X = 2
# Paddle 1 (right) position coordinates
paddle1_Y = (lHeight // 2) - (paddleH // 2)
paddle1_X = lWidth - 3 - paddleW
ball_rad = 2 #Ball radius
# // Ball position coordinates
ball_X = paddle0_X + paddleW + ball_rad
ball_Y = randint(1 + ball_rad, lHeight - ball_rad) #paddle0_Y + ball_rad
ballVelocityX = 1 # Ball left/right velocity
ballVelocityY = 1 # Ball up/down velocity
paddle0Velocity = -1 # Paddle 0 velocity
paddle1Velocity = 1 # Paddle 1 velocity
while (ball_X - ball_rad > 1) and (ball_X + ball_rad < lWidth - 2):
# // Increment ball's position
ball_X += ballVelocityX
ball_Y += ballVelocityY
# // Check if the ball is colliding with the left paddle
if ball_X - ball_rad < paddle0_X + paddleW:
# // Check if ball is within paddle's height
if (ball_Y > paddle0_Y) and (ball_Y < paddle0_Y + paddleH):
ball_X +=1 # Move ball over one to the right
ballVelocityX = -ballVelocityX # Change velocity
# Check if the ball hit the right paddle
if ball_X + ball_rad > paddle1_X:
# Check if ball is within paddle's height
if (ball_Y > paddle1_Y) and (ball_Y < paddle1_Y + paddleH):
ball_X -= 1 # Move ball over one to the left
ballVelocityX = -ballVelocityX # change velocity
# // Check if the ball hit the top or bottom
if (ball_Y <= ball_rad) or (ball_Y >= (lHeight - ball_rad - 1)):
# Change up/down velocity direction
ballVelocityY = -ballVelocityY
# // Move the paddles up and down
paddle0_Y += paddle0Velocity
paddle1_Y += paddle1Velocity
# // Change paddle 0's direction if it hit top/bottom
if (paddle0_Y <= 1) or (paddle0_Y > lHeight - 2 - paddleH):
paddle0Velocity = -paddle0Velocity
# // Change paddle 1's direction if it hit top/bottom
if (paddle1_Y <= 1) or (paddle1_Y > lHeight - 2 - paddleH):
paddle1Velocity = -paddle1Velocity
# Draw the Pong Field
myOLED.clear(myOLED.PAGE) # Clear the page
# Draw an outline of the screen:
myOLED.rect(0, 0, lWidth - 1, lHeight)
# Draw the center line
myOLED.rect_fill(lWidth//2 - 1, 0, 2, lHeight)
# Draw the Paddles:
myOLED.rect_fill(paddle0_X, paddle0_Y, paddleW, paddleH)
myOLED.rect_fill(paddle1_X, paddle1_Y, paddleW, paddleH)
# # Draw the ball:
myOLED.circle(ball_X, ball_Y, ball_rad)
# Actually draw everything on the screen:
myOLED.display()
time.sleep(.01) # Delay for visibility
time.sleep(.2)
#-------------------------------------------------------------------
def textExamples(myOLED):
print("Text!")
# Demonstrate font 0. 5x8 font
myOLED.clear(myOLED.PAGE) # Clear the screen
myOLED.set_font_type(0) # Set font to type 0
myOLED.set_cursor(0, 0) # Set cursor to top-left
# There are 255 possible characters in the font 0 type.
# Lets run through all of them and print them out!
for i in range(256):
# You can write byte values and they'll be mapped to
# their ASCII equivalent character.
myOLED.write(i) # Write a byte out as a character
myOLED.display() # Draw on the screen
# time.sleep(.05)
# We can only display 60 font 0 characters at a time.
# Every 60 characters, pause for a moment. Then clear
# the page and start over.
if (i%60 == 0) and (i != 0):
time.sleep(.1)
myOLED.clear(myOLED.PAGE) # Clear the page
myOLED.set_cursor(0, 0) # Set cursor to top-left
time.sleep(.5) # Wait 500ms before next example
# Demonstrate font 1. 8x16. Let's use the print function
# to display every character defined in this font.
myOLED.set_font_type(1) # Set font to type 1
myOLED.clear(myOLED.PAGE) # Clear the page
myOLED.set_cursor(0, 0) # Set cursor to top-left
# Print can be used to print a string to the screen:
myOLED.print(" !\"#$%&'()*+,-./01234")
myOLED.display() # Refresh the display
time.sleep(1)
myOLED.clear(myOLED.PAGE)
myOLED.set_cursor(0, 0)
myOLED.print("56789:<=>?@ABCDEFGHI")
myOLED.display()
time.sleep(1)
myOLED.clear(myOLED.PAGE)
myOLED.set_cursor(0, 0)
myOLED.print("JKLMNOPQRSTUVWXYZ[\\]^")
myOLED.display()
time.sleep(1)
myOLED.clear(myOLED.PAGE)
myOLED.set_cursor(0, 0)
myOLED.print("_`abcdefghijklmnopqrs")
myOLED.display()
time.sleep(1)
myOLED.clear(myOLED.PAGE)
myOLED.set_cursor(0, 0)
myOLED.print("tuvwxyz{|}~")
myOLED.display()
time.sleep(1)
# Demonstrate font 2. 10x16. Only numbers and '.' are defined.
# This font looks like 7-segment displays.
# Lets use this big-ish font to display readings from the
# analog pins.
for i in range(25):
myOLED.clear(myOLED.PAGE) # Clear the display
myOLED.set_cursor(0, 0) # Set cursor to top-left
myOLED.set_font_type(0) # Smallest font
myOLED.print("A0: ") # Print "A0"
myOLED.set_font_type(2) # 7-segment font
myOLED.print("%.3d" % randint(0,255))
myOLED.set_cursor(0, 16) # Set cursor to top-middle-left
myOLED.set_font_type(0) # Repeat
myOLED.print("A1: ")
myOLED.set_font_type(2)
myOLED.print("%.3d" % randint(0,255))
myOLED.set_cursor(0, 32)
myOLED.set_font_type(0)
myOLED.print("A2: ")
myOLED.set_font_type(2)
myOLED.print("%.3d" % randint(0,255))
myOLED.display()
time.sleep(.1)
# Demonstrate font 3. 12x48. Stopwatch demo.
myOLED.set_font_type(3) # Use the biggest font
ms = 0
s = 0
while s <= 5:
myOLED.clear(myOLED.PAGE) # Clear the display
myOLED.set_cursor(0, 0) # Set cursor to top-left
if s < 10:
myOLED.print("00") # Print "00" if s is 1 digit
elif s < 100:
myOLED.print("0") # Print "0" if s is 2 digits
myOLED.print(s) # Print s's value
myOLED.print(":") # Print ":"
myOLED.print(ms) # Print ms value
myOLED.display() # Draw on the screen
ms +=1 # Increment ms
if ms >= 10 : #If ms is >= 10
ms = 0 # Set ms back to 0
s +=1 # and increment s
# Demonstrate font 4. 31x48. Let's use the print function
# to display some characters defined in this font.
myOLED.set_font_type(4) # Set font to type 4
myOLED.clear(myOLED.PAGE) #Clear the page
myOLED.set_cursor(0, 0) #Set cursor to top-left
# Print can be used to print a string to the screen:
myOLED.print("OL")
myOLED.display() # Refresh the display
time.sleep(1)
myOLED.clear(myOLED.PAGE)
myOLED.set_cursor(0, 0)
myOLED.print("ED")
myOLED.display()
time.sleep(1)
myOLED.set_font_type(1)
myOLED.clear(myOLED.PAGE)
myOLED.set_cursor(0, 0)
myOLED.print("DONE!")
myOLED.display()
time.sleep(1)
#-------------------------------------------------------------------
def runExample():
# These three lines of code are all you need to initialize the
# OLED and print the splash screen.
# Before you can start using the OLED, call begin() to init
# all of the pins and configure the OLED.
print("\nSparkFun Micro OLED Everything Example\n")
myOLED = qwiic_micro_oled.QwiicMicroOled()
if not myOLED.connected:
print("The Qwiic Micro OLED device isn't connected to the system. Please check your connection", \
file=sys.stderr)
return
myOLED.begin()
# clear(ALL) will clear out the OLED's graphic memory.
# clear(PAGE) will clear the Arduino's display buffer.
myOLED.clear(myOLED.ALL) # Clear the display's memory (gets rid of artifacts)
# To actually draw anything on the display, you must call the
# display() function.
myOLED.display()
time.sleep(1)
myOLED.clear(myOLED.PAGE)
print("-"*30)
pixelExample(myOLED)
print("-"*30)
lineExample(myOLED)
print("-"*30)
shapeExample(myOLED)
print("-"*30)
textExamples(myOLED)
print("-"*30)
print("DONE")
#-------------------------------------------------------------------
if __name__ == '__main__':
try:
runExample()
except (KeyboardInterrupt, SystemExit) as exErr:
print("\nEnding OLED Everything Example")
sys.exit(0)
|
Basic Operation
1 2 3 4 5 6 7 8 9 10 11 12 13 14 15 16 17 18 19 20 21 22 23 24 25 26 27 28 29 30 31 32 33 34 35 36 37 38 39 40 41 42 43 44 45 46 47 48 49 50 51 52 53 54 55 56 57 58 59 60 61 62 63 64 65 66 67 68 69 70 71 72 73 74 75 76 77 78 79 80 81 82 83 84 85 86 87 88 89 | #!/usr/bin/env python
#-----------------------------------------------------------------------------
# qwiic_micro_oled_hello.py
#
# Simple Example for the Qwiic MicroOLED Device
#------------------------------------------------------------------------
#
# Written by SparkFun Electronics, May 2021
#
# This python library supports the SparkFun Electroncis qwiic
# qwiic sensor/board ecosystem on a Raspberry Pi (and compatable) single
# board computers.
#
# More information on qwiic is at https:# www.sparkfun.com/qwiic
#
# Do you like this library? Help support SparkFun. Buy a board!
#
#==================================================================================
# Copyright (c) 2021 SparkFun Electronics
#
# Permission is hereby granted, free of charge, to any person obtaining a copy
# of this software and associated documentation files (the "Software"), to deal
# in the Software without restriction, including without limitation the rights
# to use, copy, modify, merge, publish, distribute, sublicense, and/or sell
# copies of the Software, and to permit persons to whom the Software is
# furnished to do so, subject to the following conditions:
#
# The above copyright notice and this permission notice shall be included in all
# copies or substantial portions of the Software.
#
# THE SOFTWARE IS PROVIDED "AS IS", WITHOUT WARRANTY OF ANY KIND, EXPRESS OR
# IMPLIED, INCLUDING BUT NOT LIMITED TO THE WARRANTIES OF MERCHANTABILITY,
# FITNESS FOR A PARTICULAR PURPOSE AND NONINFRINGEMENT. IN NO EVENT SHALL THE
# AUTHORS OR COPYRIGHT HOLDERS BE LIABLE FOR ANY CLAIM, DAMAGES OR OTHER
# LIABILITY, WHETHER IN AN ACTION OF CONTRACT, TORT OR OTHERWISE, ARISING FROM,
# OUT OF OR IN CONNECTION WITH THE SOFTWARE OR THE USE OR OTHER DEALINGS IN THE
# SOFTWARE.
#==================================================================================
# Example - simple command to setup the OLED.
#
from __future__ import print_function
import qwiic_micro_oled
import sys
import time
def runExample():
# These three lines of code are all you need to initialize the
# OLED and print the splash screen.
# Before you can start using the OLED, call begin() to init
# all of the pins and configure the OLED.
print("\nSparkFun Micro OLED Hello Example\n")
myOLED = qwiic_micro_oled.QwiicMicroOled()
if not myOLED.connected:
print("The Qwiic Micro OLED device isn't connected to the system. Please check your connection", \
file=sys.stderr)
return
myOLED.begin()
# clear(ALL) will clear out the OLED's graphic memory.
# clear(PAGE) will clear the Arduino's display buffer.
myOLED.clear(myOLED.ALL) # Clear the display's memory (gets rid of artifacts)
# To actually draw anything on the display, you must call the
# display() function.
myOLED.display()
time.sleep(2)
myOLED.clear(myOLED.PAGE) # Clear the display's buffer
myOLED.print("Hello World") # Add "Hello World" to buffer
# To actually draw anything on the display, you must call the display() function.
myOLED.display()
if __name__ == '__main__':
try:
runExample()
except (KeyboardInterrupt, SystemExit) as exErr:
print("\nEnding OLED Hello Example")
sys.exit(0)
|