Quickstart
Setting up Ella
This tutorial will guide you through the process of creating and deploying your first Ella-based site. Since Ella is a CMS, we will create a blog. This first step will take us through setting up our environment, installing all the dependencies and kicking off the project. Before you dive into it, we suggest you go through the official Django tutorial to get yourself familiar with Django since we will be relying on that.
Dependencies
We assume that python, setuptools and python-imaging (PIL) are
installed on your system directly since they can be non-trivial to install the
python way. We will be working with pip and virtualenv which are great
tools for any Python project.
Note
We will not cover any version control, but we strongly advise you use some (we prefer GIT) to keep track of your emerging project.
First we need to install virtualenv (under root):
easy_install virtualenv
Now we can create and activate a virtualenv where our project and all related code will reside:
virtualenv ella_sandbox
source ella_sandbox/bin/activate
Next, install Ella into your fresh virtualenv. Ella has all it’s dependencies
covered in it’s setup, so it’s fairly sufficent to run following command
using pip:
pip install ella
After these steps, everything required is ready and we can create a new Django project using Ella in standard Django way:
mkdir ellablog
cd ellablog
django-admin.py startproject ellablog
settings.py
Our first step in actual code will be adding Ella to your project’s
INSTALLED_APPS along with some required settings, the resulting values
(unchanged values are omitted) should look similar to this:
...
INSTALLED_APPS = (
    'django.contrib.admin',
    'django.contrib.auth',
    'django.contrib.contenttypes',
    'django.contrib.sessions',
    'django.contrib.sites',
    'django.contrib.redirects',

    'ella.core',
    'ella.photos',
    'ella.articles',
)
...
In order to create our new blog, we are gonna need some HTML templates showing
post listings, post details, hompage etc. Therefore, we have to tell
Django, where to look for those templates. This settings are kept in
settings.py contained in root of our project. Second, we need to specify
a directory + URL used to serve media files from:
Note
Media files and static files are not the very same thing. We consider media files those, that are uploaded dynamically by users, e.g. main article photos. On the other hand, static files usually don’t change and their common representatives include CSS styleseets, JS sources etc.
from os.path import join, dirname

PROJECT_ROOT = dirname(__file__)

# set the templates directory
TEMPLATE_DIRS = (
    join(PROJECT_ROOT, 'templates'),
)

# give Django media settings
MEDIA_ROOT = join(PROJECT_ROOT, 'media')
MEDIA_URL = '/media/'
This will tell Django, that it should look for the templates in directory
templates which is located in the root of the project directory. And
store the media in PROJECT_ROOT/media/ directory.
urls.py
Last thing to configure is the URL mappings. We want to include ella.core.urls
which handle all the Ella magic but also create some mappings that will
serve our static files (and static files for admin) in the development server.
Note that these patterns for static files will work only when DEBUG mode
is turned on since it would be rather inefficent in production (for more on
this topic, see Managing static files section in Django docs). In similar
fashion, serve also media files discussed in previous paragraph:
from django.conf.urls.defaults import *
from django.conf import settings
from django.contrib import admin
from django.contrib.staticfiles.urls import staticfiles_urlpatterns

# register apps for Django admin and let the apps do any initialization they need
from ella.utils.installedapps import call_modules
call_modules(('admin', 'register', ))

urlpatterns = patterns('',)

# actual URL mappings
urlpatterns += patterns('',
    # serve media files
    (r'^%s/(?P<path>.*)$' % settings.MEDIA_URL, 'django.views.static.serve', { 'document_root': settings.MEDIA_ROOT, 'show_indexes': True }),

    # run Django admin
    (r'^admin/', include(admin.site.urls)),

    # enable Ella
    (r'^', include('ella.core.urls')),
) + staticfiles_urlpatterns()
Note
Instead of calling admin.autodiscover we are using Ella’s
call_modules which is a more generic version of the same thing. and
allows us to load additional modules - namely register.py where, by
convention all Ella apps put the codethey need for their initialization
(connecting signal handlers, registering custom
urls etc.)
Database
Last configuration step is the database settings. Ella supports all Django DB backends. Example configuration for MySQL can look like this:
DATABASES = {
    'default': {
        'ENGINE': 'django.db.backends.mysql',
        'NAME': 'ellablog',
        'USER': 'user',
        'PASSWORD': '',
        'HOST': '',
        'PORT': '',
    }
}
To make this work, you should make appropriate database by your custom
DB-related tool (such as command-line tool mysql in Linux-like operating
systems). After creating the database, you can proceed with creating all the
required tables by Django for you (and admin user during this process):
python manage.py syncdb
Congratulations, you should have a working Ella project. If you start the development server by typing:
python manage.py runserver
try to load the site’s root. If everything worked out, you should get a welcome screen looking similar to this:
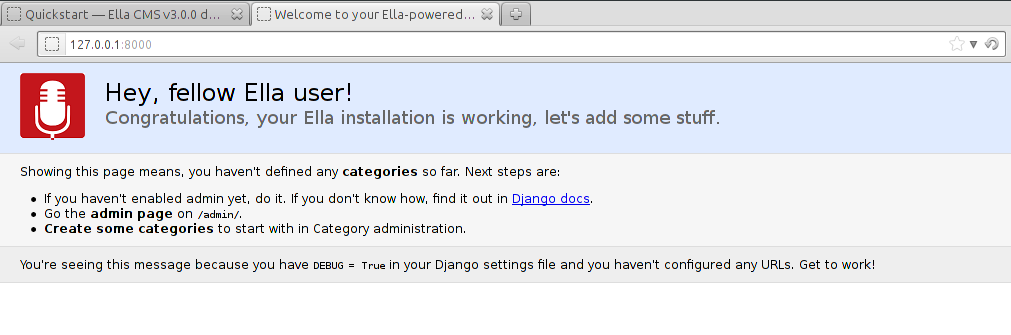
Now when we have a working project, we need to actually create the site in the
admin interface. To use it, go to /admin/ and log in using credentials
you entered when creating your superuser account during the syncdb command.
While being there we will also create an article - our very first blog post so
that we can actually have something to work with in our templates in the next
step of the tutorial.
Note
If you are impatient to start, just play around with the admin to create
one instance of ella.core.models.Category to get the root of the web
working and then one ella.articles.models.Article published in that
category (you might need to create additional model like Author on the
way).
First we need some theory on how Ella handles sites, categories and published objects though.
Ella sites and categories
Ella was designed to serve several sites from a single database. It does so by
using Django’s built-in sites framework. The sites app creates a
default Site called example.com during the syncdb command. Just
rename the domain name to relevant value and you will have an Ella site,
just empty.
Within sites, Ella organizes content into categories. Categories (instances
of ella.core.models.Category) are organized in a tree for each site. Every
site needs to have exactly one what we call root category - a category without
a parent. This category then represents the root of the website (/).
Categories are represented by their tree_path - a path of slugs from
root category, for example with categories layout:
Ella Blog
    About
    Technology
        Concepts
        Django
            Django applications
        Typical deployment env
the tree_path values would be:
| Category | tree_path attribute |
|---|---|
| Ella Blog | |
| About | about |
| Technology | technology |
| Concepts | technology/concepts |
| Django | technology/django |
| Django applications | technology/django/django-applications |
| Typical deployment env | technology/typical-deployment-env |
Category‘s URL is it’s tree_path (which is what makes the root category
the root of the site) and every post in Ella belongs to one or more categories,
nothing shall exist outside of the category tree.
Publishable object
The main objective of Ella is publishing content. Ella together with it’s
plugins provides several types of content (Article,
Gallery, Quiz, ...) and can be easily extended to add more (just define
the model) or used with existing models.
For ease of manipulation and efficiency, all content models inherit from
ella.core.models.Publishable. This base class has all the fields needed to
display a listing of the content object (title, description, slug,
photo), basic metadata (category, authors, source). When using
Ella API you will always receive an instance of the actual class (Article)
and not the base class (Publishable). If you have access to only a
Publishable instance the target property will return instance of the
correct class (it holds a reference to it’s ContentType).
Information about publication are also kept on the Publishable model
(attributes published, publish_from, publish_to and static).
All these information together are used to create an URL for the object
which will point to it’s detail (e.g. article content). There are two types
of publication with slightly different use cases:
time-based has URL containing the date of publishing and should be used for objects that have some relevance to date (most of the content presumably since Ella was designed to power magazines and news sites). The URL of an object published in time-based way will look like:
/category/tree/path/[YEAR]/[MONTH]/[DAY]/[CONTENT_TYPE_NAME]/slug/
so for example:
/about/2007/08/11/ella-first-in-production/
static has no date in it’s URL and should be used for objects with universal validity. URL of statically published objects contains a primary key reference to avoid namespace clashes:
/category/tree/path/[PK]-slug/
for example:
/about/1-ella-first-in-production/
Just setting up publish information for a Publishable object makes it
visible (starting from publish_from) but doesn’t make it appear in any
listing in any Category. For that you need to specify in which categories
you want it listed.
Listing object
ella.core.models.Listing instances carry the information in which Category
and when should be a publishable object listed - it enables users to list the
object in as many categories as they wish at arbitrary times (but not sooner
that the Publishable.publish_from).
By default, listings in the root category only contain Listings specifically
targeted there whereas listings for any subcategory also contains all the
listings of it’s subcategories. This is a model we found most useful when
working with large sites where the site’s homepage needs to be controlled
closely by editors and the interim categories only serve as aggregators of all
the content published in them either directly or via a subcategory.
Creating a site
Now you should have enough information to be able to start exploring the
admin (found on /admin/) and create your own site and it’s first post.
You will know that you were succesfull if you manage to create and publish an
article whose URL gives you a TemplateDoesNotExist exception upon
accessing - that means we are ready to create some templates.
Basic templates
Now that we have some sample data to work with we can finally start creating the templates we need to get the site running.
Note
For more information on what templates Ella uses and what context is passed in, have a look at Template overview.
page/category.html
First we will create a template rendering a category: page/category.html.
This is a default template that will be used for all categories if their
specific template (one with their path) isn’t found. The two most important
variables in the context we want to use is {{ category }} containing the
Category model itself and {{ listings }} containing a list of
Listing objects for that category ordered by publish_from and/or
priority.
The basic template will look like:
<h1>Welcome to category {{ category.title }}</h1>
<p>{{ category.description }}</p>

{% for listing in listings %}
    <p>
        <a href="{{ listing.get_absolute_url }}">{{ listing.publishable.title }}</a>
        {{ listing.publishable.description|safe }}
    </p>
{% endfor %}
That will render the category title, description and a list of objects published
in that category. Upon accessing / you should then see the name of the
category and the article you created in administration.
page/listing.html
This template represents the archive, it gets the same context as
page/category.html and the same code can be used. We will use the same code:
{% extends "page/category.html" %}
page/object.html
As with page/category.html, page/object.html is a fallback template that
will be used for rendering any object if more suitable template isn’t found.
In real life we will probably have different templates for different content
types, but to verify the concept and get us started a simple template should
be enough:
<h1>{{ object.title }}</h1>
<p>Published on {{ placement.publish_from|date }} in category: <a href="{{ category.get_absolute_url }}">{{ category }}</a></p>
{% render object.description %}
This template will have access to the actual Publishable subclass instance
(Article in our case), as opposed to page/category.html and
page/listing.html which only gets instance of Publishable by default.
Note the use of {% render %} templatetag that is used to render rich-text
fields (which object.description is) thorought Ella.
Now that we have a set of rudimentary templates, we can try doing something useful with them.
Enhancing templates
Since Ella is a regular Django application, even it’s templates are just plain Django templates. Therefore we just refer you to other sources and Common gotchas & FAQs section to learn more about the templating language and it’s best practices, we will try to focus just on Ella-specific parts.
Boxes
First change we will make is abstract the rendering of the object listing on
category homepage and archive. To do this, Ella provides a Box for
individual objects. It’s primary use is as a
templatetag. Boxes can be rendered
for objects accessible through a variable or through a database lookup:
{% box <box_name> for <object> %}{% endbox %}
    or
{% box <box_name> for <app.model> with <field> <value> %}{% endbox %}
What {% box %} does is a little more then fancy include - it retrieves the
object, find the appropriate template and renders that with object-specific
context. The context can be quite different for an Article or Photo gallery.
Boxes are usually used throughout an Ella site to provide maximum flexibility
in rendering objects and also for embedding objects into rich text fields stored
in the database (in text of an article for example). Some applications (
Defining positions on the page for example) also use boxes to represent objects.
To create our first box, we just need to create a template called
box/listing.html containing:
<p>
    <a href="{{ object.get_absolute_url }}">{{ object.title }}</a>
    {% render object.description %}
</p>
And change page/category.html to use the box instead of manually specifying
the output:
<h1>Welcome to category {{ category.title }}</h1>
<p>{{ category.description }}</p>

{% for listing in listings %}
    {% box listing for listing %}{% endbox %}
{% endfor %}
If you still struggle, why the bloody Box is used instead of standard
{% include SOMETHING %}, keep in mind following advantages:
They know which template to use with proper fallback engine.
- The provide class-specific context so that an Article can have
different context than Photo.
Template fallback mechanisms
In last step we created a few templates that should suffice for an entire site based on Ella. In real life you probably wouldn’t want every category and every object to share the same template. Ella provides a simple mechanism to target your templates more directly.
Let’s say that we want to create a specific template for rendering articles,
just create a template called page/content_type/articles.article/object.html
and you are done - next time you visit some article’s URL, this template will
get rendered instead of your page/object.html. This template would be a
good place to render the text of an article for example:
{% extends "page/object.html" %}
{% block content %}
    {% render object.content %}
{% endblock %}
Now if you just define the appropriate block in your page/object.html:
<h1>{{ object.title }}</h1>
<p>Published on {{ object.publish_from|date }} in category: <a href="{{ category.get_absolute_url }}">{{ category }}</a></p>
{% render object.description %}

{% block content %}{% endblock %}
You should be able to see your article’s text on the web.
Another way you can override your templates is based on Category. For
example if you want to create a custom template for your root category (and
your root category’s slug is ella-blog), just create one called
page/category/ella-blog/category.html:
<h1>Welcome to site {{ category.site }}</h1>
<p>{{ category.description }}</p>

{% for listing in listings %}
    {% box listing for listing %}{% endbox %}
{% endfor %}
You will be greeted into the site and not your root category next time you visit the root of your blog. Just create any subcategory to check it will remain unaffected.
You can use the same simple mechanism (creating new templates) to change the look of your boxes for individual objects as well.
Note
For more detailed explanation of all the possible template names, have a look at Views, Template overview and Templatetags documentation.